How to Set Up Multi-Factor Authentication For Your Tesla
If you own a Tesla, you know that it's one of the most technologically advanced cars on the road. And part of what makes it so cutting-edge is its ability to connect to the internet and use various apps and services. But with this increased connectivity comes increased risk.
That's why it's important to set up Tesla multi-factor authentication. This way, even if someone gets hold of your username and password, they won't be able to access your account unless they also have the second factor of authentication.
In this blog post, I'll show you how to enable multi-factor authentication for your Tesla step-by-step so that you can rest assured knowing that your car is secure.
Let's get started!
What is Tesla Multi-Factor Authentication (MFA)?
Tesla multi-factor authentication provides a secondary layer of security for your Tesla account beyond the standard login email address and password. MFA, by design, requires extra authentication steps (at least two) to verify your identity, so even if someone were to obtain your login credentials, they would still be unable to access your account without your authorisation.
If you own a Tesla, you should strongly consider setting up multi-factor authentication for added security. But why?
Why Should You Set Up Tesla MFA?
Multi-factor authentication makes it much harder for hackers to gain access to your account as they would need both a username and password – plus another form of authentication, such as a unique code generated on an authenticator app which only you have access to.
Unlike passwords that can be relatively easily guessed or stolen, MFA acts as an extra layer of protection against data breaches.
No matter how secure your username and password are, it's always a good idea to add an extra layer of protection on top to make sure your Tesla account stays safe from prying eyes.
How to Setup Multi-Factor Authentication on Tesla account (Steps)
Setting up Tesla MFA is actually quite simple! Just follow these steps:
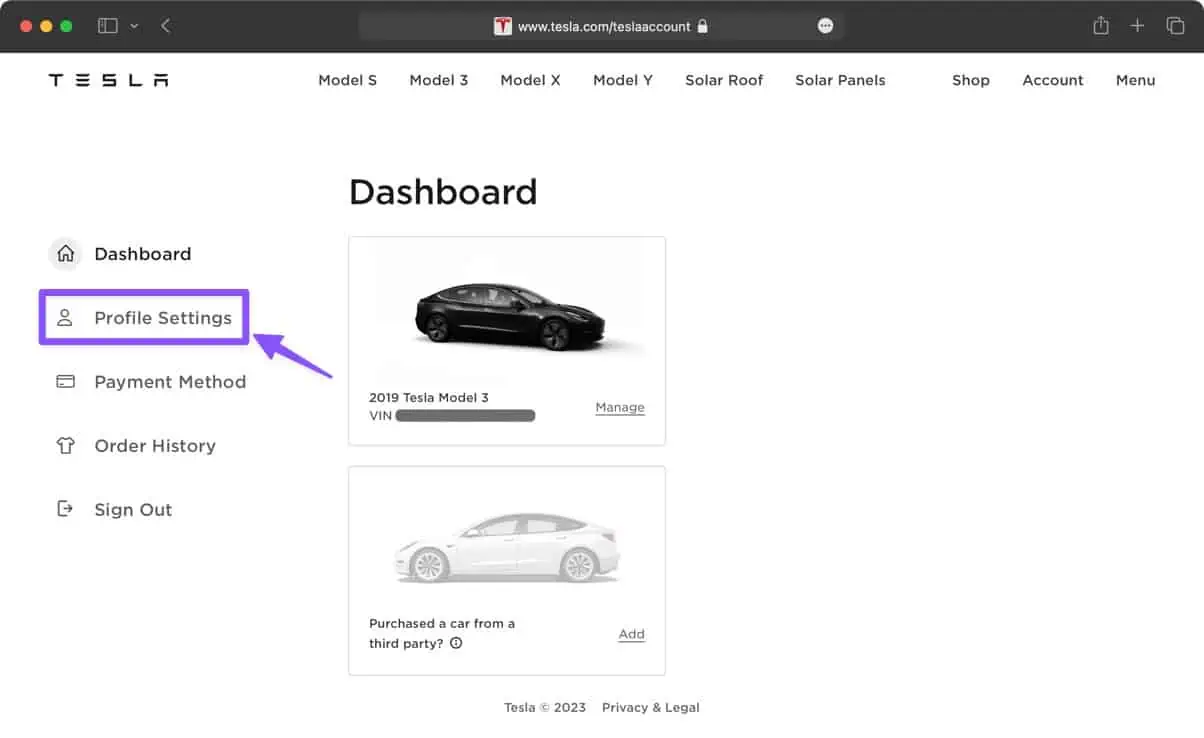
1. Sign in to your Tesla account

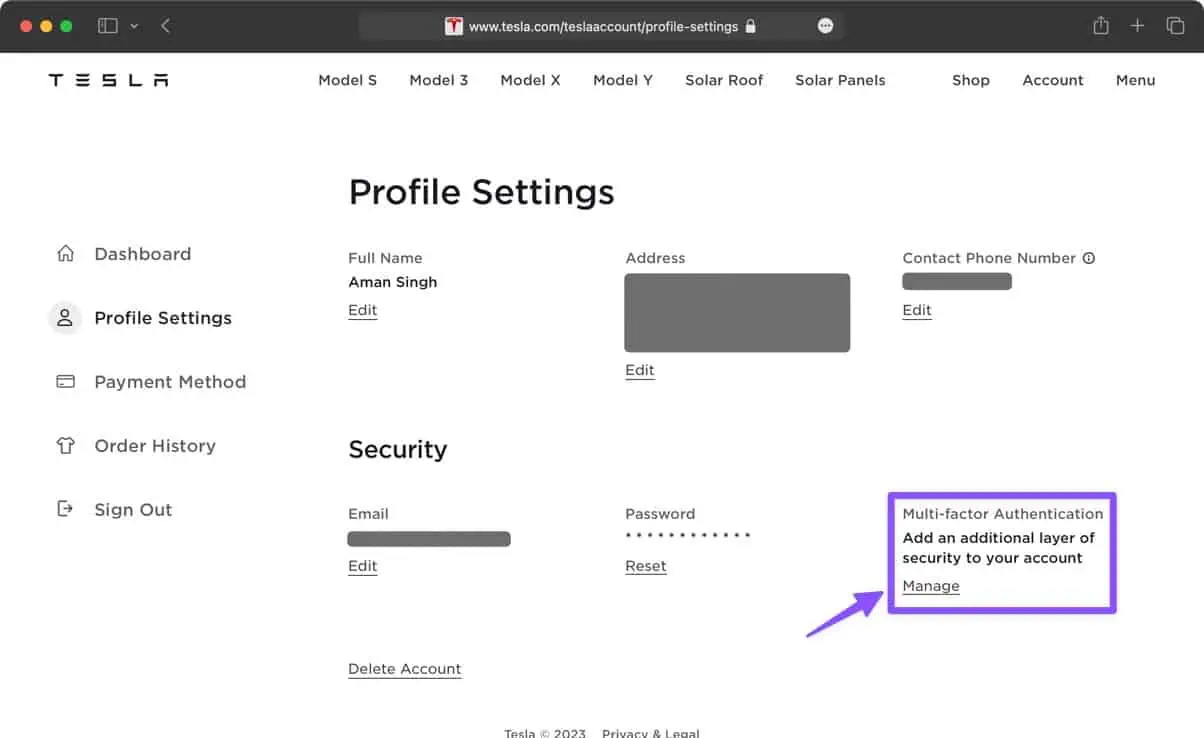
Login to your Tesla account and go to Profile Settings.
2. Go to Multi-factor Authentication Settings
On the Profile Settings page, look for the MFA section. Click Manage.
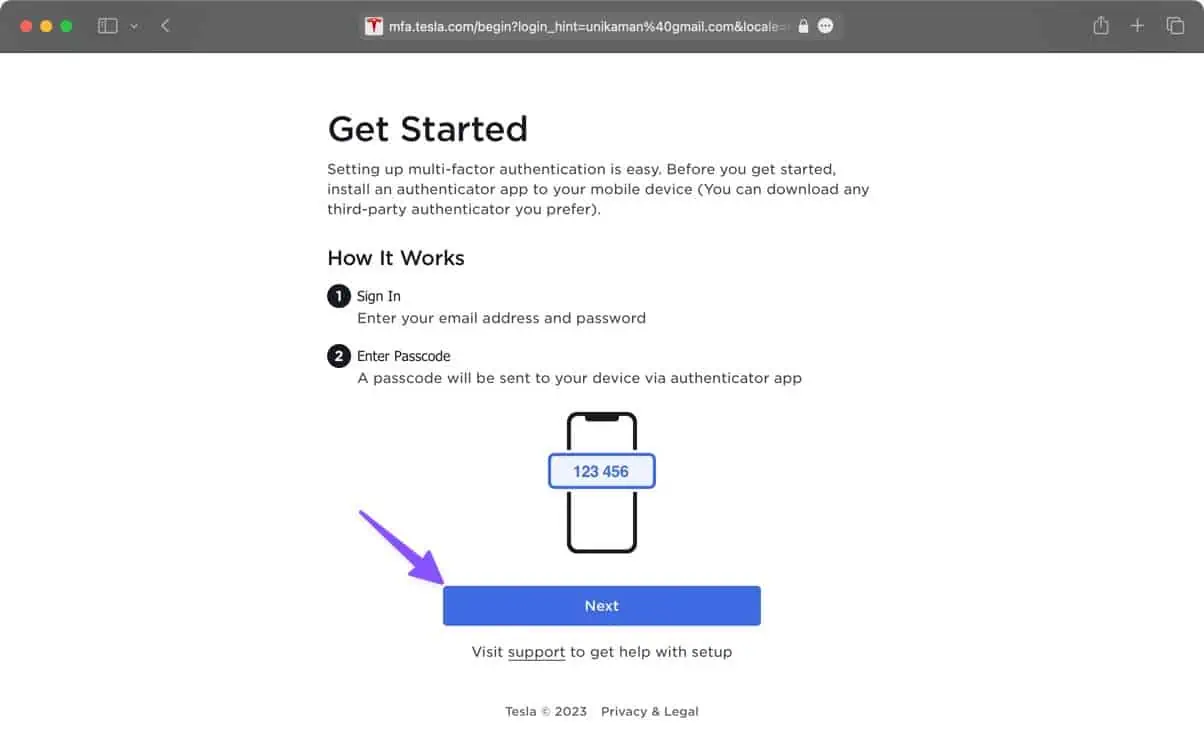
3. Install an Authenticator app
This page provides you with information on the next steps involved. Click Next when you're ready.
If you don't already have one, install an authenticator app on your phone.
You can go for Google Authenticator, Microsoft Authenticator, 2FAS or Authy. Or simply stick to the one you already have – they all work the same.
Here's a list of the 5 best authenticator apps for Tesla I have curated for you!
What is an authenticator app? It's a simple piece of software that generates a unique code (every 60 seconds) used to verify your identity and can only be used once. So if someone were to try and use the same code twice, they would be unsuccessful. The auth app is connected to your login account using the secret key that is generated when you set up the app (which I will show you in a sec).
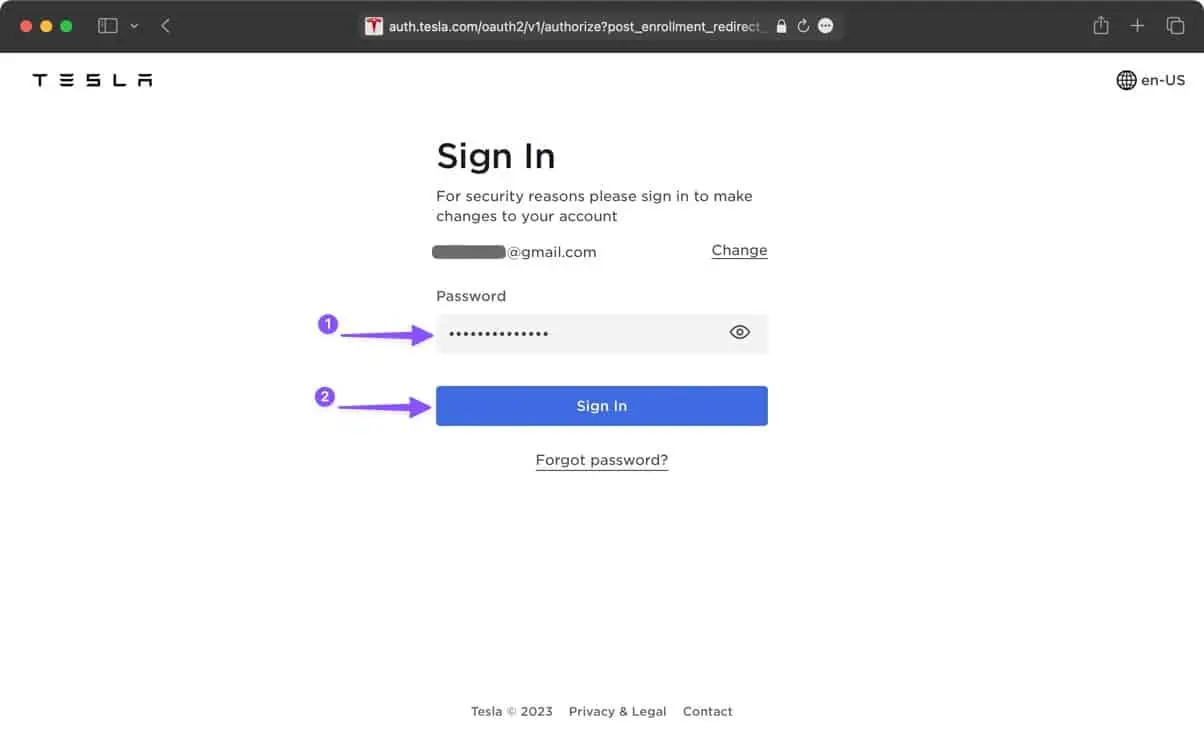
4. Verify Tesla Login
For security, you'll be asked to verify your credentials again. Enter your password and click Sign In.
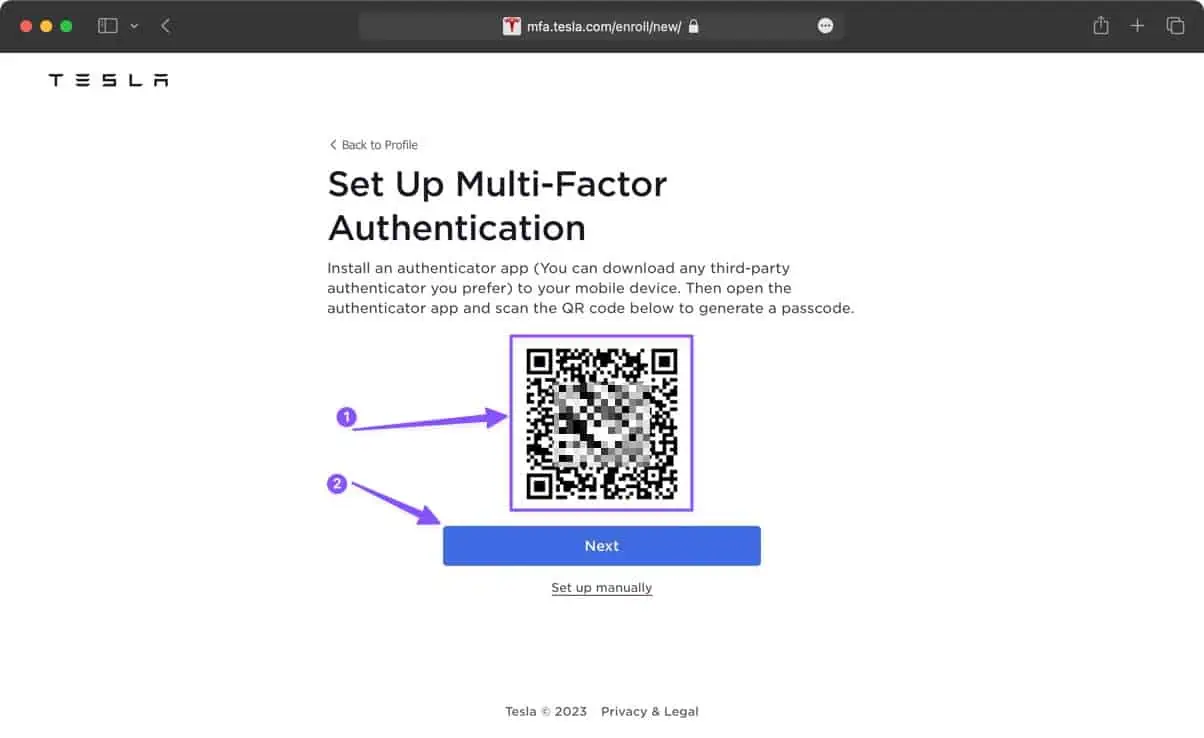
5. Set Up Multi-factor authentication
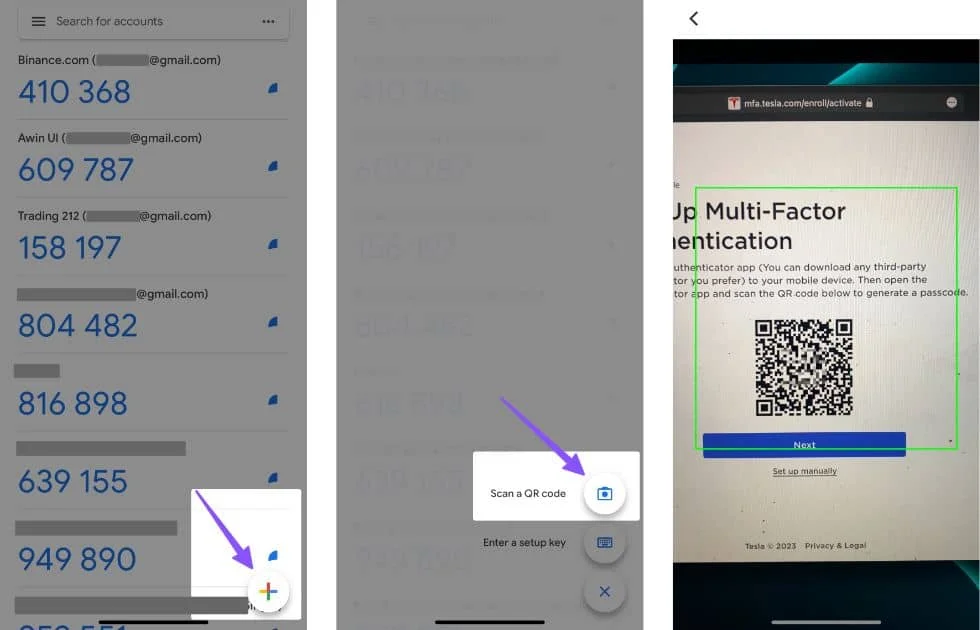
In this step, a QR code will show on the screen. You'll need to scan this using the authenticator app to connect to your Tesla account. This QR code is unique to your account and contains the secret key needed to complete the MFA setup. So keep this page open while you grab your phone to scan it.
6. Scan the QR code
Once you have installed an authenticator app, open it and scan the QR code using the + button on the authenticator app.
This will add your Tesla account to the app and show a 6-digit code.
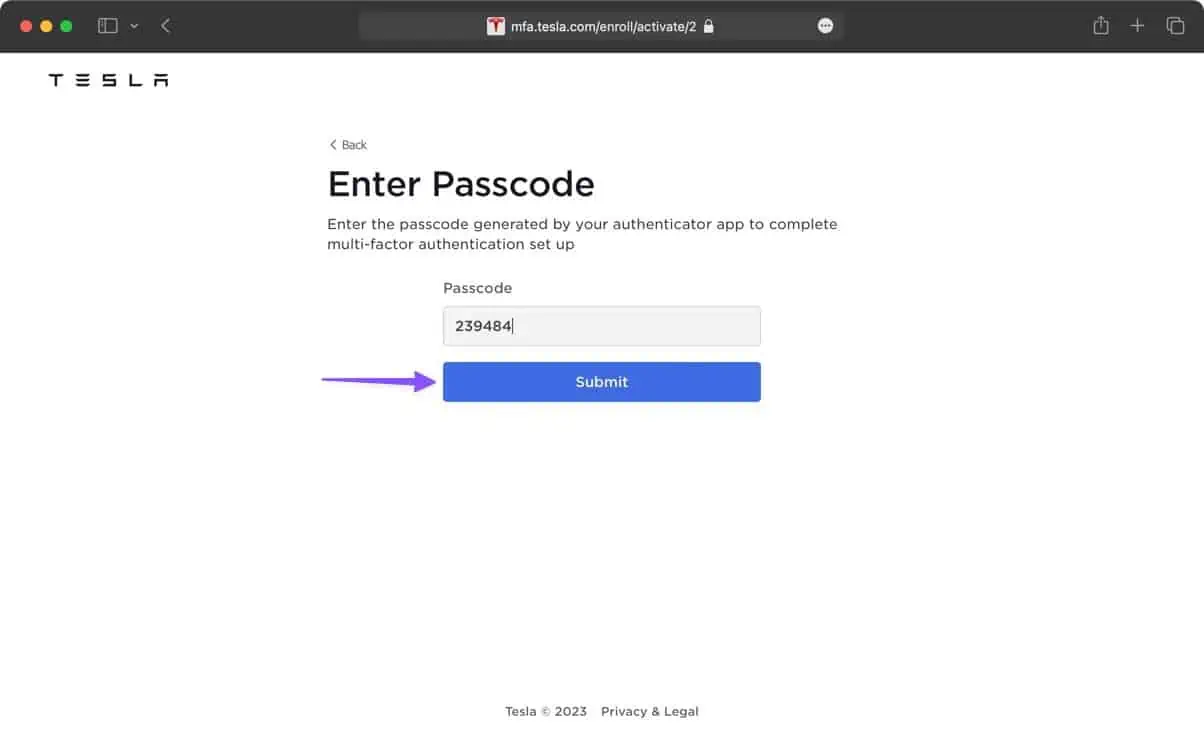
7. Enter the authentication code
After scanning the QR code and adding your Tesla account to the authenticator app, you'll be presented with an authentication code that changes every 60 seconds. Copy and paste this code into the Passcode field on the MFA Setup page and click Submit.
Congratulations! You've just enabled multi-factor authentication for your Tesla account. There's one last (important) step before you go, though! I'll get to that in a sec.
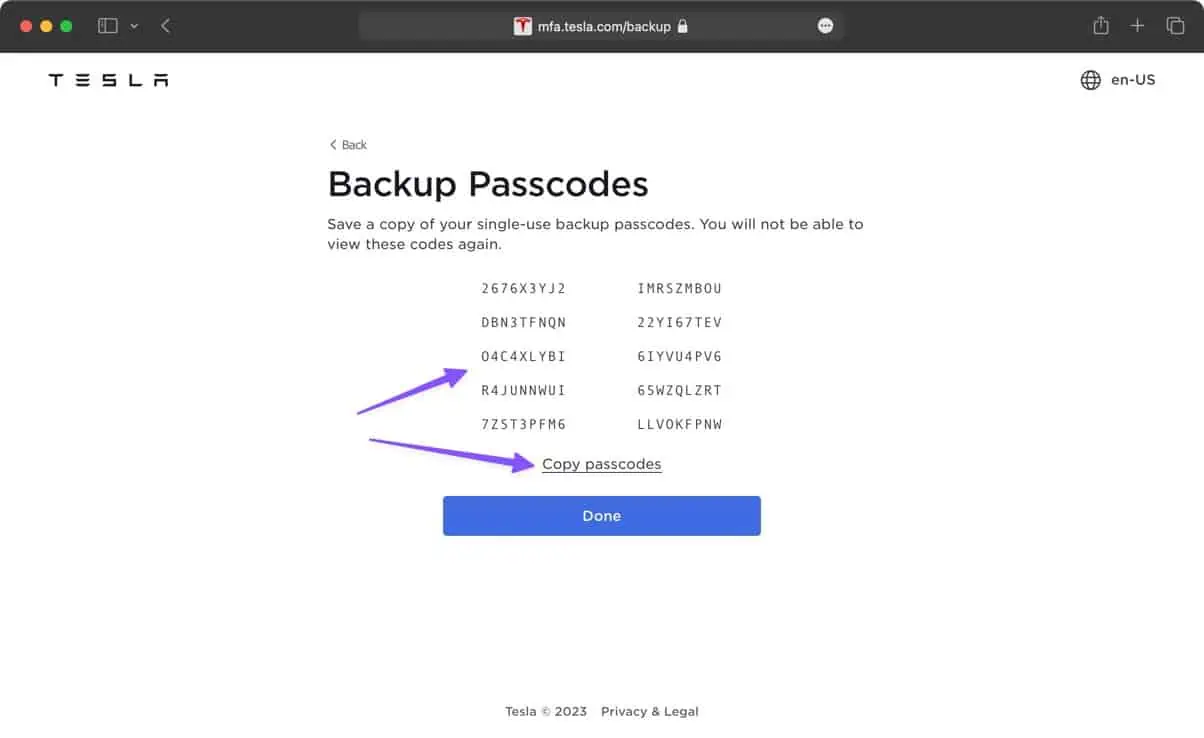
8. Save your Backup (recovery) codes
Once you complete the setup, Tesla will provide you with 10 single-use backup codes. These are for use in case you lose your phone or don't have access to the authenticator app.
Without them handy, you won't be able to access your account! You'll need to contact Tesla's customer service team and confirm ownership in order to reset your MFA. This may involve answering security questions or providing proof of identity.
So please, take a moment and avoid the hassle! Make sure you copy and save these codes somewhere secure or take a printout and store it in a safe place. You'll not be able to view those codes again once you leave this page, so this step is crucial!
And that's it! Now, you're good to go!
All Done

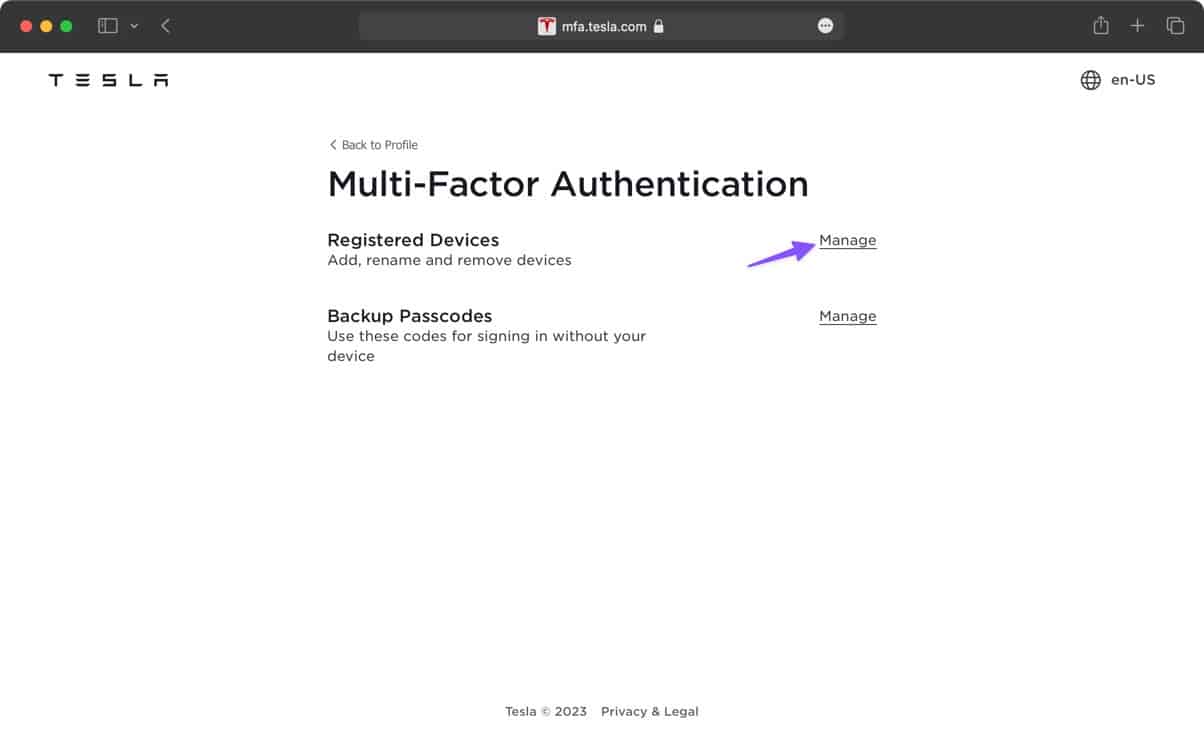
That's all done for you! You've enabled Multifactor Authentication on your Tesla account. When you click on Manage MFA settings from your Profile Settings screen, you'll see the above screen with your Registered Devices and Backup Passcodes.
From now on, every time you log in to your Tesla account, you will be asked to provide a Passcode. So, open the authenticator app, copy and paste the code, and you're in!
You can now rest easy knowing that anyone who attempts to gain access will have to provide multiple levels of verification – making it significantly more difficult for unauthorised users to log into your account.
Best Authenticator Apps for Tesla
If you're looking for my recommendations on which authenticator app to use for your Tesla account, here are a few you can try.
- Google Authenticator
- Microsoft Authenticator
- Authy
Which one do you use and why? Let me know in the comments below. If you need my help in picking one, I have done a separate detailed post about the best Tesla authenticator apps.
What are Backup Passcodes?
What do you do when you lock yourself out of your house leaving your key inside? Use the backup/duplicate key, right?
A Backup Passcode is just that.
In cases when you don't have access to your trusted device or you lose your phone, you can log in to your Tesla account using an active backup passcode.
This is why, as I mentioned above, you need to make sure you save your backup passcodes in a safe place so you know where to look when you need them.
If you've set up 2FA/MFA authentication for your other online accounts like Gmail or Cryptocurrency, you'll be familiar with this.
If you lose your trusted device and don't have access to the backup codes, there is no way to then log in to your Tesla account online or through the phone app. You'll need to get in touch with the Tesla support team for further help.
How to Disable MFA on Tesla Account?
You can disable multi-factor authentication on your Tesla Account by deleting your Registered Device. To do that, log in to your account and go to Profile Settings > Multi-factor authentication. Then, click Manage settings.
Here you will see two options:
- Registered Devices: Here you can Add, rename or remove devices registered
- Backup Passcodes: Manage your backup codes. In case you've lost access to your backup codes, you can generate new ones here.
Click Manage next to Registered Devices.
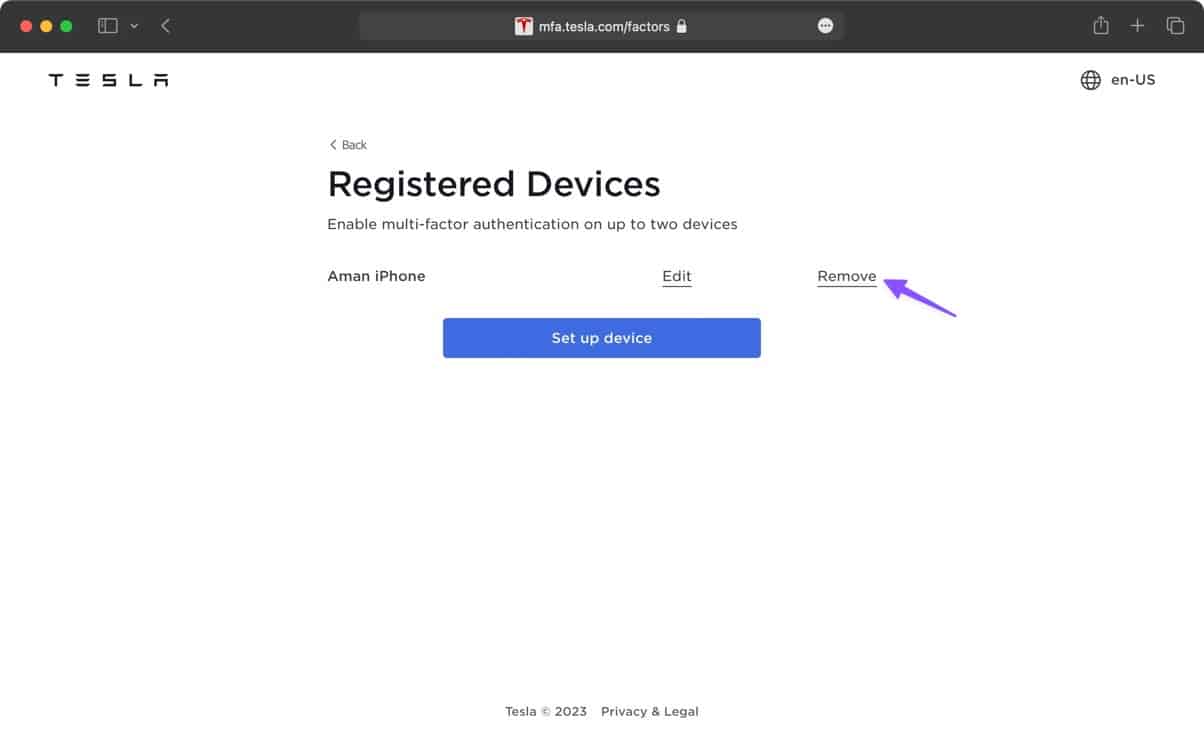
Here you will see a list of all your registered devices for Multi-factor authentication. Click remove next to the one you want to remove.
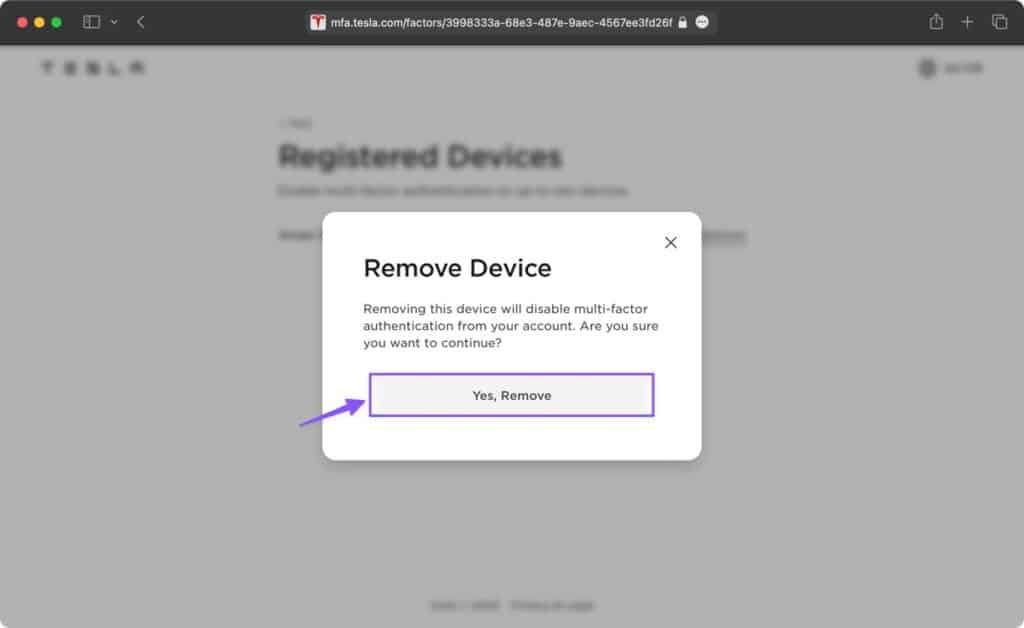
Click “Yes, Remove” to confirm on the pop-up.
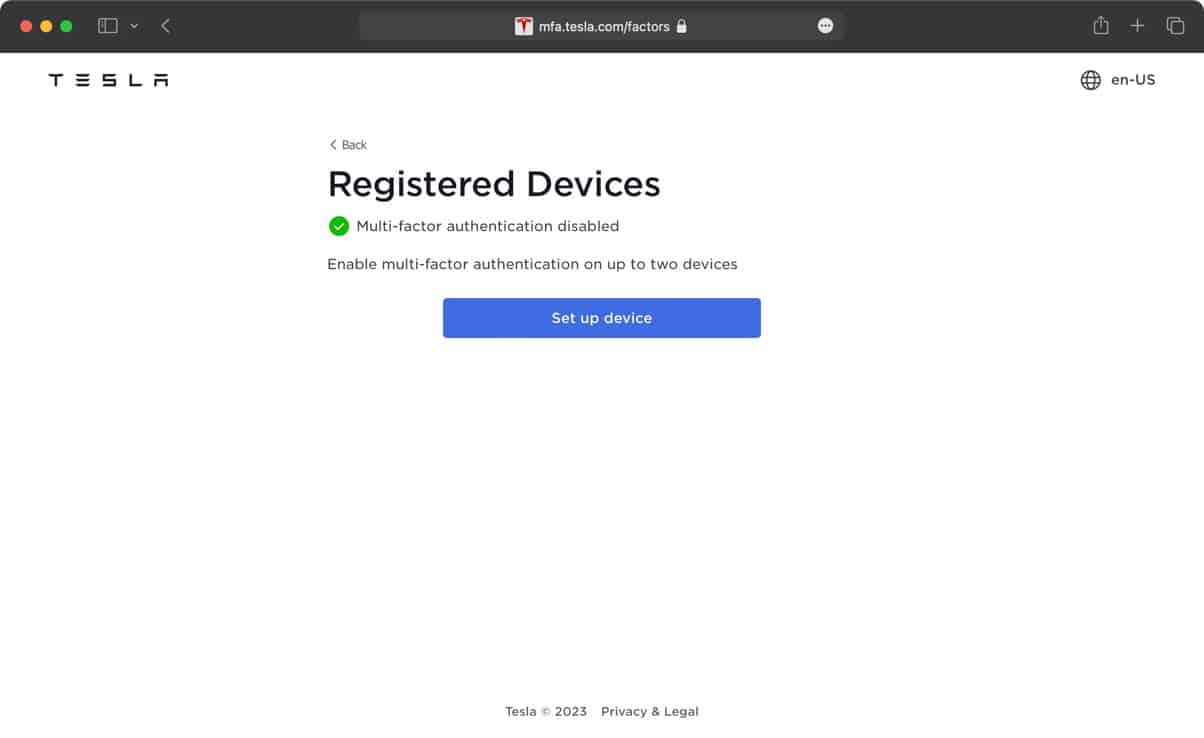
That's it, you're done! This will disable MFA on your Tesla account.
Best Practices to Keep Your Tesla Account Safe
Here are some best practices for keeping your Tesla account secure:
- Always use a strong, unique password for your account and never share it with anyone.
- Activate the multi-factor authentication (MFA) to add an extra layer of security.
- Don't click on any suspicious links or attachments sent via email or text message – they could be malicious phishing scams.
- Change your password regularly, especially if you think someone has had access to it without your knowledge or consent.
Wrapping Up
Multi-factor authentication is a great way to add an extra layer of security to your Tesla account. It helps protect you from unauthorized access and provides peace of mind knowing that your information is safe and secure.
In this blog post, I've given you a step-by-step guide on how to enable MFA on your Tesla account, as well as some best practices for keeping your account secure. Remember, it's always better to be safe than sorry – so take a few minutes and set up multi-factor authentication!
It's a one-time step that will help make sure your vehicle is always safe and secure.
Don't forget to store your backup passcodes in a safe location so that they are easily accessible if you ever require them!
Thanks for reading, and happy driving!